Learn how to create a survey with Personio Surveys.
Before you start
To create a survey, you need edit permissions to Surveys > Survey Creation.
Tip:
To save time, you can:
▶︎ Create a survey using a template.
▶︎ Copy an existing survey: Click on the three dots next to the survey and select Copy.
▶︎ Create sample surveys: Click Create 3 example surveys here.
To create a survey from scratch, go to Surveys and click Add survey.
Add questions
Add questions from the library
Personio offers a library of expert-reviewed, best-practice questions. They help you save time and get accurate results. You can add or remove them from your questionnaire as needed, and you can only edit their placeholders.
- Click the book icon on the right-hand side to open the question library.
- Optional: Add PMF score questions to measure engagement, retention, and how likely employees are to recommend the company.
- Click Questions. Open a question category or use the search bar.
- To add a question, click the toggle next to it. To remove it, click the toggle again.
- Optional: Personalize the question’s placeholders. For example, add your company name. When you update a placeholder, you can choose to change it everywhere in your survey.
Notes:
▶︎ Personio calculates the engagement score based on three library questions. You can only add or remove them as a group.
▶︎ Personio creates library questions in the language selected by the survey creator in their personal settings. If you need to create surveys in different languages, you need to change the language preference in your personal settings. Alternatively, you can use Chrome add-ons for translation.
Add custom questions
To add your own questions to the survey, follow these steps:
- Click the text field next to the pencil icon on the upper left to name the survey.
- Optional: Click Add Introduction to provide information about the survey.
- To add new questions, click Add new question, type in the question, and select the Question type.
You can select between 4 different question types:
▶︎ Open text
▶︎ Single choice
▶︎ Multiple choice
▶︎ Scale: 1-5 Likert scale, with freely configurable top- and bottom labels.
▶︎ Net Promoter Score (NPS Ⓡ). - Optional: To create another question of the same style, click the Copy icon.
- Optional: If you want the question to be mandatory, activate Required.
- Optional: For single choice, multiple choice, and scale questions, activate Allow comments to receive more context on the chosen answer.
- Optional: To change the order of the questions, drag and drop them to the desired space.
Notes:
▶︎ The number of scales cannot be adjusted, as research indicates that a higher number tends to randomize results, and scales without a midpoint force the participant to either like or dislike the suggestion.
▶︎ You can add only one NPS question type in a survey.
Add themes
- Click Add Themes if you want to categorize a question.
- To add a new theme, click Add Themes> Manage Themes>Add themes.
- Enter the name of the theme and click the check mark. Read more about themes.
Library questions come with their preset theme. You cannot add a custom theme to a library question.
Select participants
Once you are happy with the questions, select who should participate in the survey.
- Click Go to Participants.
- To choose participants directly, click Directly. Use the search bar and the filter to select the participants.
- To automatically add participants to an onboarding or offboarding survey, click On lifecycle event. You can only add surveys as an action in workflows if they have On lifecycle event participant settings. Learn to automate onboarding and offboarding surveys.
Note:
The displayed employees, attributes, and filters take into account your individual permissions.
If the survey is configured to launch at a certain date (scheduled), we will check the Active status of the employees in your company at that exact launch date and time. This way, only employees who are set to Active at that exact point in time will be invited to the survey as participants.
Configure the survey
1. Set up confidentiality and minimum responses
If a survey is marked as confidential, it will not reveal the names of participants or other identifiable information. Additionally, you can define a confidentiality minimum for responses.
Example
If you set the confidentiality minimum at 5 – each question needs to have at least 5 responses to show the results. For any question that has fewer responses than the minimum you defined, no results will be shown.
To configure the privacy and the minimum responses of the survey, follow these steps:
- Click on Go to Configuration.
- Under Privacy, make sure that the option Confidential is highlighted in blue.
- Define the minimum number of responses.
2. Choose the survey collaborators
In Collaborators, click Edit to select people to collaborate on the survey, if needed:
- Survey admins can edit the surveys and see all responses.
- Employees with full results view can see all the survey results. For recurring surveys, this means they can see all rounds.
3. Define the timeline
Choose whether the survey should happen once, or be recurring.
▶︎ One-time surveys happen only once, and are ideal for collecting ad-hoc feedback. You can select when you want the survey to be sent to the participants, choose how long the survey should be open.
- In Timeline, select One-time survey.
- Select when to open the survey, and after how many days it should close, if needed.
▶︎ Recurring surveys repeats in multiple rounds over time. They help you compare results, identify trends, and areas of concern in real-time.
- In Timeline, select Recurring survey.
- Select when the first round should start, and how long each round should be open for.
- Select the frequency of the survey.
- Select when the survey should end: after a certain number of rounds, or on a specific date.
4. Configure reminders
Choose when to send reminders:
- To remind participants about the survey, edit the number of days before the closing date of the survey to send an automatic email reminder to participants. Click Add email reminders to configure up to four reminders.
- Then click Launch survey / Schedule survey and the status of the survey will change to Open or Scheduled.
Note
Surveys can only be launched at the full hour. All dates and times are hard-coded to the Berlin timezone (UTC+1 during wintertime, UTC+2 during summertime). Responses can be submitted until 11:59 p.m. (Europe/Berlin) on the day the survey closes.
Inbox task and email invite for participants
Inbox task
Once the survey is launched, participants will receive an task for the survey in their Personio inbox widget. When hovering over the task, they can click the arrow button and the survey will be launched in a new window. Alternatively, they can click the X button to remove the task from the inbox widget.
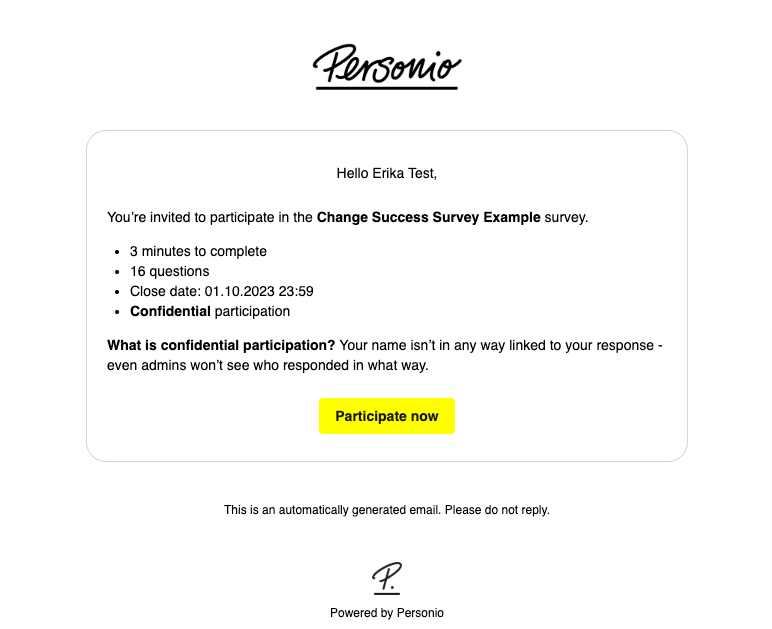
Email invite
In addition to the notification, participants will also receive an email with a link to the survey (either directly, or on the date and time that you scheduled). The email text contains the following information:
- Survey name,
- Info on confidentiality,
- Time to complete,
- Number of questions,
- Close date and time.
Notes
▶︎ The email text to the participant cannot be changed.
▶︎ The language of the email will be selected according to the personal language settings of the recipient.
▶︎ The image at the top will be replaced with your company logo.
Share the survey URL
If you want to share the URL to the survey on a different channel to send out reminders, you can also copy the URL to the survey and share it with your employees. Follow these steps:
- Go to Surveys, and select the survey you want to share.
- Click on the three dots next to the survey, and select Copy survey link from the drop-down-menu.
- The link will automatically be copied to your clipboard.
Tip:
If you are on the results page of a survey, you can also click on the three dots in the top-right corner and select Copy survey link from the drop-down-menu.
Delete a survey
To delete a survey, follow these steps:
- Go to Surveys.
- Hover over the relevant survey and click the three dots.
- Select Delete and confirm your choice.
The system deletes the survey and all its results.
Next steps
Learn more about Survey analytics and reporting.
Net Promoter®, NPS®, NPS Prism®, and the NPS-related emoticons are registered trademarks of Bain & Company, Inc., NICE Systems, Inc., and Fred Reichheld. Net Promoter ScoreSM and Net Promoter SystemSM are service marks of Bain & Company, Inc., NICE Systems, Inc., and Fred Reichheld.