This article provides an overview of the People List and explains its different functionalities.
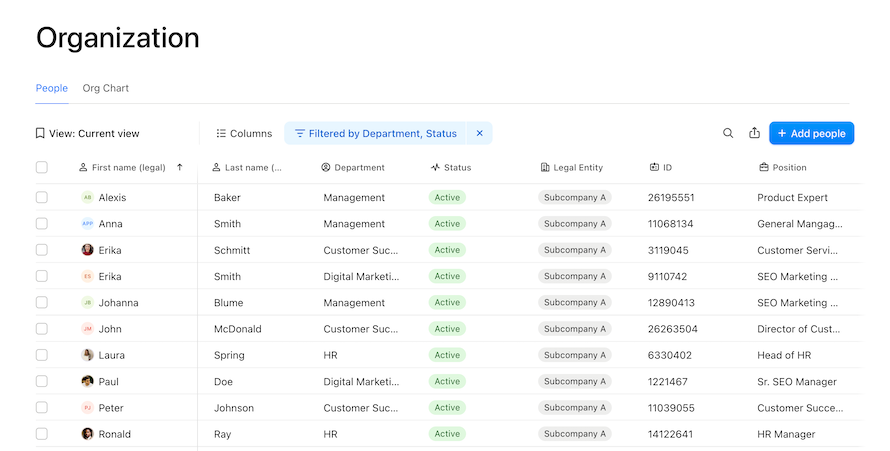
The People List is a central space where you can view all employees in your company and their details. You can customize the list to display relevant information at a glance. You can also save specific views, making it easy to return to them with just a click.
You can quickly edit employee information from the People List, schedule changes, and make changes in bulk.
Access the People List
To access the People List, go to Organization > People list.
The People List is visible to all employees, but employees only see other employees and data they have access to based on their permissions.
Viewing employees by status
By default, employees can see those with an Active status in the People List. To see employees with Onboarding, Leave, or Inactive status, employees need viewing rights to the profile section containing the Status attribute.
Tip:
Employees only see the profile data they have permission to view based on their role. If an employee has no section permissions, they will not see any employees in the People List, even Active ones.
Customization
Add or remove columns
The employee data shown in the People List is arranged in columns. You can customize the list by adding, removing, and re-ordering columns to suit your needs.
You can add up to 25 columns to your view. When exporting the People List, you can add more columns to your export file.
To add or remove columns, follow these steps:
- Go to Organization > People list.
- Click the Columns tab. A list of attributes appears.
- Click the toggle icon to the right of an attribute to add it to the list view. Use the drag-and-drop icon to arrange the columns in your preferred order.
The view now only contains the columns that you have selected.
Customize columns
The first column is frozen by default and remains visible as you scroll through the list. For this reason, we recommend that you set the First name or Last name attribute as the first column.
You can adjust the column width to fit the text. At the top of the list, hover in between the names of two columns until an icon appears.
Apply filters
The Filter functionality allows you to narrow the list based on the criteria you define. You can combine filter rules to narrow the information further.
To apply filters, follow these steps:
- Go to Organization > People list.
- Click the Filter tab or any column header.
- Define your rule set, for example, “Workplace contains Berlin”. You can add multiple rules.
You see all employees whose Personal info tab contains the selected attribute values. To reset the filters, click the X icon to the right of the Filter tab.
Filter options
You can filter the information in the People List using all attributes. This includes both system and custom attributes. This allows you to filter your information in greater detail. You can only filter by attributes currently added within the People List view.
For each attribute, you can also choose from a set of conditions. The conditions available depend on the attribute type.
Example:
Filter for all employees with a hire date within a specific date range.
▶︎ Attribute: Hire date
▶︎ Attribute type: Date
▶︎ Condition: Is within range
View the table below for an overview of the conditions available for each attribute type.
| Attribute data type | Conditions available |
| General (text field) |
|
| List of options |
|
| Relationship |
|
| Multi-selection |
|
| Date |
|
| Link |
|
| Number (integer) |
|
| Number (up to two decimals) |
|
Sort the view
Click on the specific column header and select whether to sort in ascending or descending order. Depending on the attribute, the data is sorted in alphabetical, numerical, or date-based order.
Employee or attribute search
To search for an employee, use the search bar at the top right of the page.
You can also use the search bar to find a specific attribute value. For example, to view all employees with the position “Accounting”, enter “Accounting” in the search bar.
Notes:
▶︎ Your employees only see search results for those employees whose public profiles they have permissions to view (and have the Active status).
▶︎ You can only search for attribute values that are added to your current view. For example, you must add the Position column if you want to search based on position.
▶︎ You can only search for text and number type attributes.
Saved views
Create a saved view
You can save a specific People List view. This allows you to return to it when needed. You can save up to 20 People List views.
To create a saved view, follow these steps:
- Go to Organization > People list.
- Set up the People List view you want to save. Add columns and apply filters and sorting.
- Click the Views tab on the left.
- Click Save current view.
- Give your view a name and save.
Set a default view
Administrators can also set a default view. Default views are applied to all employees' lists while respecting their specific permissions.
To set a default view:
- Configure the view you want to set as default. Add columns, filters, and sorting.
- Go to the Views tab, then to Default views.
- Next to Default, click the three-dots icon.
- Select Set as default view.
Employees can now see the default view when opening the People List. They can also still create custom views.
Manage a saved view
Once you have created a saved view, you can manage it from within the Views tab. Click the three-dot icon right of the view’s name to:
- Save changes to the view (refer to the section below)
- Duplicate the view
- Copy a link to the view
- Rename the view
- Delete the view
Edit a saved view
To edit a saved view, follow these steps:
- Reset the columns and filters as needed. Apply your changes.
- In the Views tab, hover over the name of the saved view and click the three-dot icon that appears.
- Click Save changes to update the view.
Sharing options
Export a People List view
To export a specific People List view, you need data export permissions. You can only export data you have access to.
Follow these steps:
- Go to Organization > People list.
- Click the share icon in the top-right corner, and click Export.
- Choose the file format, the filter, and the columns you want to export.
▶︎ Current view means applying the filter settings from your current view.
▶︎ All employees means all employees, regardless of the current filter setting in your view. - Click Export to download your view to your browser.
Tip:
You can export specific employees by ticking the boxes next to their names.
Copy the URL
This feature allows you to copy the URL of the People List view. The filter details are saved in the URL.
You can save this URL in your browser favorites or send it to other employees. They can then open the copied URL and view the shared view according to their permissions.
Export employee profiles
You can export employee profile data from the People List for one or multiple employees. This creates a file containing the specific attributes you select.
- Go to Organization > People list.
- Select the employee by ticking the checkbox to the left of their name.
- In the top menu, click the three-dots icon.
- Click Export.
- Select your preferred file format (CSV or Excel).
- Select the attributes you want to include in the export.
- Click Export to download the file.
Employee data management
You can edit the data of multiple employees and perform bulk actions directly from the People List. This feature is useful if you want to edit the attributes of many employees at once or send multiple invitations or onboarding tasks.
To edit the data or perform an action for multiple employees:
- Go to Organization > People list.
- Check the box to the left of the relevant employees’ names.
- Select the action you want to perform from the menu bar. To edit all employees in a specific department or team, filter by it and select all.
- Follow the instructions on the screen to complete the action.
Tip:
For changing basic information in a single employee’s profile, refer to the section below on editing an employee profile.
Bulk actions available from the menu bar
The table below shows the actions available in the menu bar.
| Item | Actions you can take |
| Edit profiles |
Edit information for multiple employee profiles at once. You can select the attribute you want to change, for example, “Workplace”, and set the new value for this attribute, for example, “Berlin”. You can also set the date the change is effective—this can be a past or future date. Note: Some attributes, such as the “termination date” preset attribute, cannot be edited for multiple employees at once. |
| Edit time policies |
You can do the following:
|
| Create documents | Create documents for multiple employees, for example, work contracts or time off certificates. You can use existing templates and insert variables to customize the documents. |
| Send invites | Email invitations to employees to access Personio. Here, you can also see an employee’s invitation status. |
| Add people to role | Add employees to a role. |
| Remove people from role | Remove employees from a role. |
| Assign on / offboarding templates | Assign onboarding or offboarding templates to employees. You need to enter a hire date before you can assign an onboarding template. You need to enter a termination date before you can assign an offboarding template. |
| Complete on / offboarding | Complete on- or offboarding tasks. |
| Export | Export profile data for selected employees. You can choose which attributes to include in the export file and select the file format. |
| Delete profiles |
Delete an employee’s profile. As an added layer of security, you must also type DELETE in the respective field. This is a permanent action that cannot be revoked. Deleting an employee’s profile includes all their data and documents. |
Edit an employee’s profile from the People List
This feature allows you to edit multiple attributes for a single employee at once. To edit an employee’s profile:
- Go to Organization > People list.
- Hover over the employee’s name and click the button that appears. This opens a side drawer that contains the employee’s information.
- To edit information, click on the attribute values you want to change, for example, workplace location.
- Set the date from which the change is effective. This can be a past or future date.
- Submit your changes.
Tip:
You can schedule a future attribute change by adding the effective date. It is also possible to backdate attribute values, for example, to an employee’s hire date or the beginning of the current month.
Add a new employee from the People List
You can add a new employee from the People List. To do so:
- Go to Organization > People list.
- Click Add people at the top-right of the page.
- Enter the personal and HR information for the new employee in the relevant fields. Activate the Create account and invite toggle in the Personal information section if needed.
- Assign relevant templates, such as time off policies, onboarding templates, and working hour schedules (including their validity date).
- Click Add person.
Note:
To add new employees, you need the Add new employee access right.